
Everybody wants their homes to be decorated well by adding materials to it. According to the Revit, Materials in the sense, painting your Models. Follow the steps below to add materials to the walls, Floor, and Roof.
Add Material to wall
Step-1

-Before adding material to the walls or structure, change the visual style from hidden lines to shaded or realistic. If you change its visual style then you can easily identify the colors.
Step-2
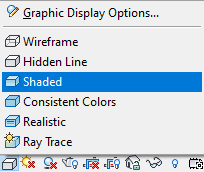
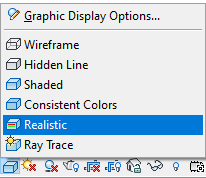
-select either shaded or realistic. Shaded Mode displays you the objects in shadow mode by preventing direct lights and the realistic mode displays you the objects in real form.
Step-3
-Click on the wall to open edit mode in the properties palette.
Step-4
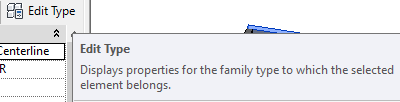
-Click on edit type and it displays the properties of the selected elements.
Step-5

-Create a Duplicate type and rename it. Duplicates are created because selected elements that you are editing will be changed and non-selected elements remain unchanged.
Step-6

-From the tabular column select material By category. Click on that to open a list of materials or colors.
Step-6
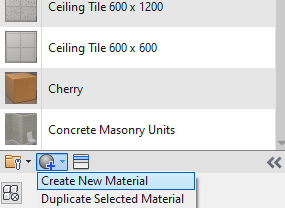
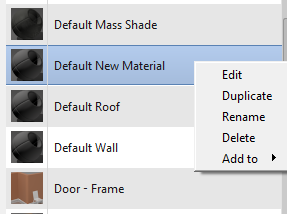
-At the bottom of the Material browser Click on the icon as shown to create a new material. You can create a Default new material so that you can work easily by identifying your own materials.
Step-7

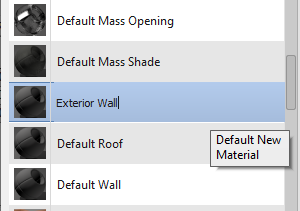
-Right-click on the default material that you created and Rename it so that you can identify easily.
Step-8

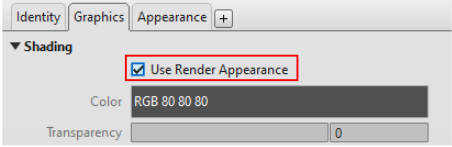
-Tick on ‘Use Render Appearance’ so when you render the whole model the materials will appear clearly.
Step-9
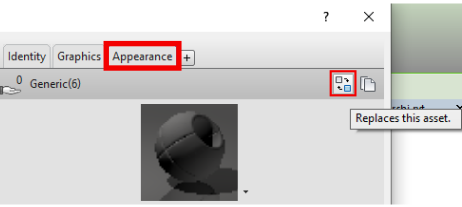
-Replace the default material by clicking ‘Replaces this asset’.
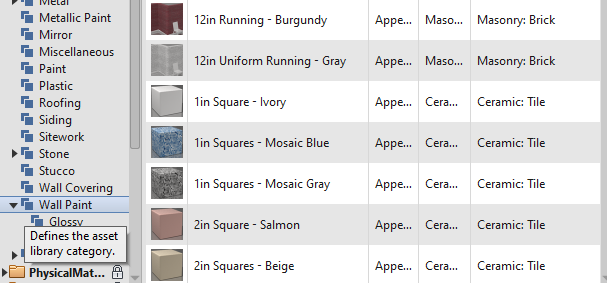
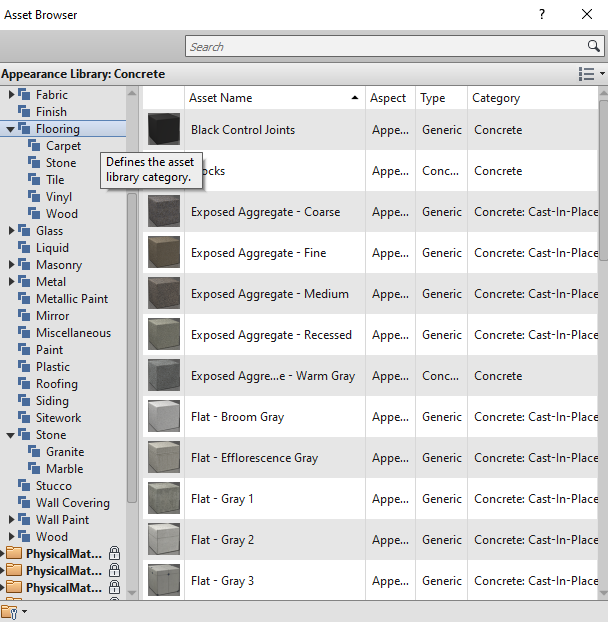
Step-10
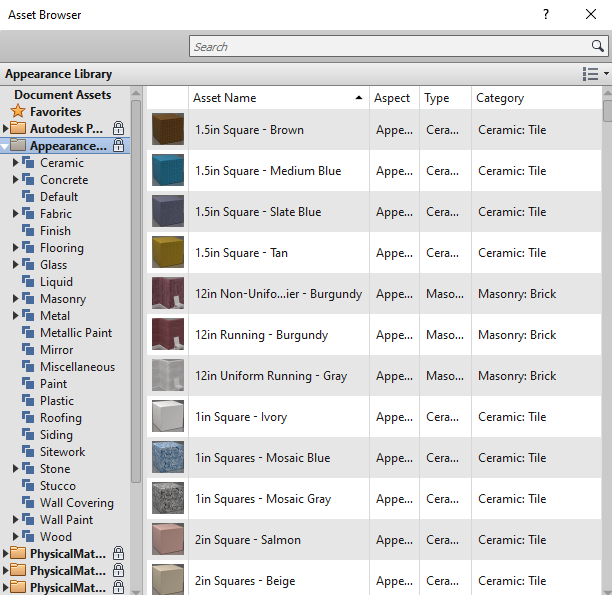
-Asset browser dialogue box will appear and then choose the materials wisely.
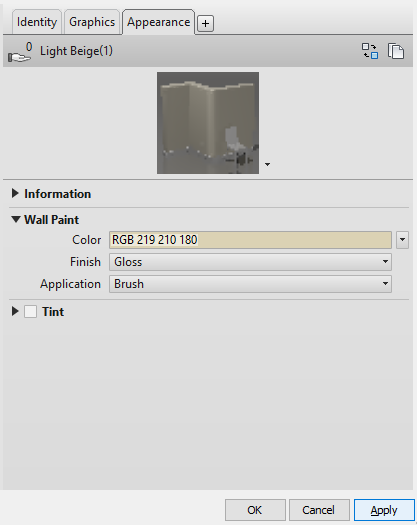
Step-11
-Click on Wall paint and then choose Glossy or matte style. Glossy materials shine and the Matte materials are free from shine. For exterior walls, I suggest you apply glossy material.
Step-12

-Replace the current asset in the editor with this asset, which means you are replacing the material with the Default Material given by Revit.
Step-13
-Click on ‘Apply’ to apply the materials on the walls and then press Ok and press Enter.
Step-14
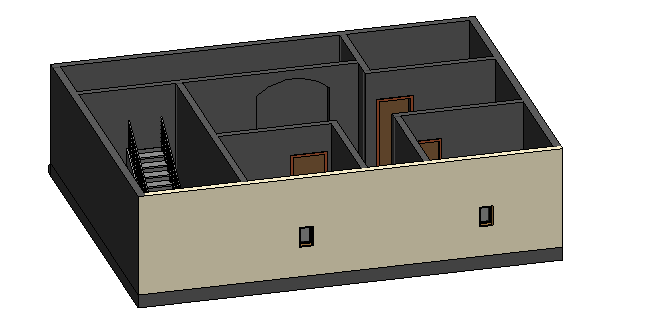
-Final image looks as shown.
Add Material to Floor
Step-1

-Select floor and click on edit type. It displays the properties of the selected element.
Step-2

– From the tabular column select material ‘By category’. Click on that to open the material browser, from that you can find list of materials or colors.
Step-3

-At the bottom of the Material browser Click on the icon as shown to create a new material. You can create a Default new material so that you can work easily by identifying your own materials.
Step-4

-Right-click on the default material that you created and Rename it so that you can identify easily.
Step-5

-Tick on ‘Use Render Appearance’ so when you render the whole model the materials will appear clearly.
Step-6

-Replace the default material by clicking ‘Replaces this asset’.
Step-7

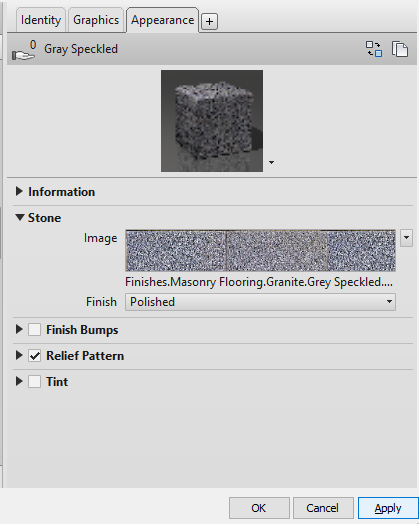
-Select material from Asset Browser and then you choose Granite or marble or any other flooring material such as wood, carpet, tile, etc.
Step-8

-Replace the current asset in the editor with this asset, which means you are replacing the material with the Default Material which is given by Revit.
Step-9
-Click on ‘Apply’ to apply the materials on the Floor and then press Ok and press Enter.
Step-10
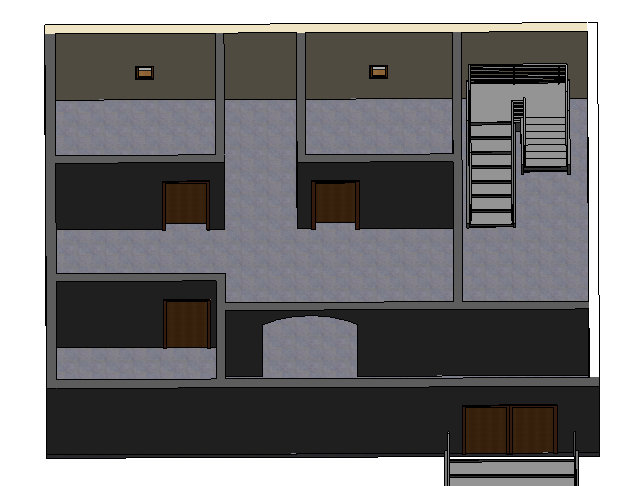
-Change view and you can observe clearly the material applied to the floor.
Add material To Roof
Step-1
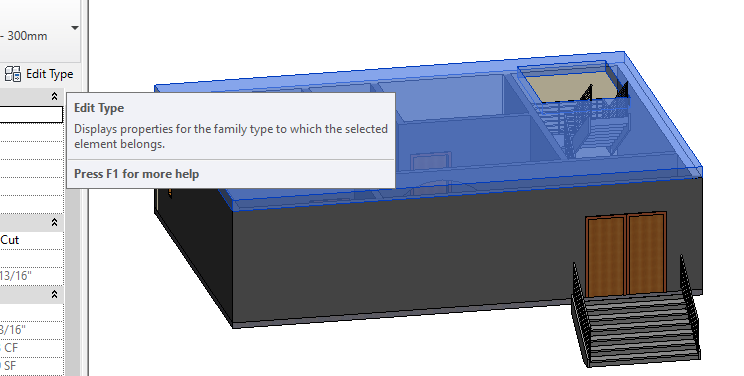
-Select the roof and click on the edit type to open the properties of the selected elements.
Step-2
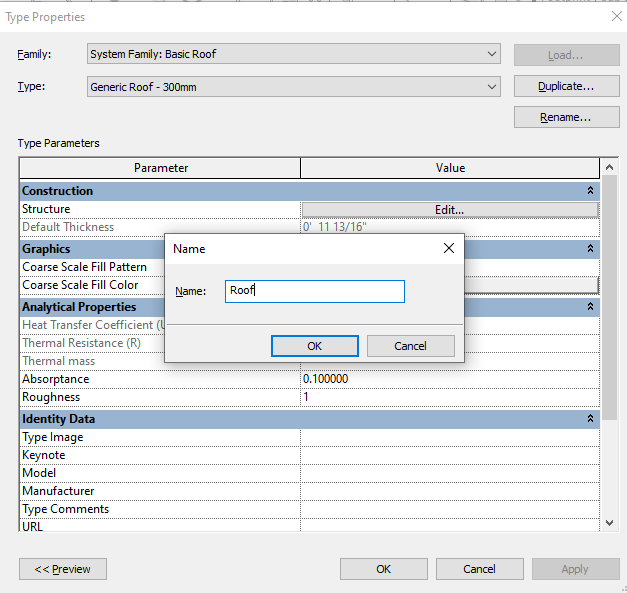
-Create a duplicate type and rename it.
Step-3
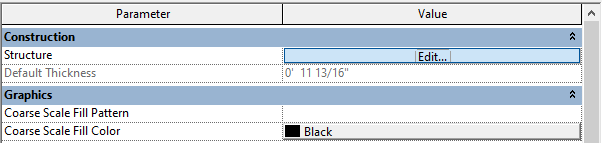
-Click on Edit to change the Thickness as well as you can add materials to it.
Step-4

– From the tabular column select material By category. Click on that to open the material browser, from that you can find list of materials or colors.
Step-5

-At the bottom of the Material browser Click on the icon as shown to create a new material. You can create a Default new material so that you can work easily by identifying your own materials.
Step-6
-Right-click on the default material that you created and Rename it so that you can identify easily.
Step-7
-Tick on ‘Use Render Appearance’ so when you render the whole model the materials will appear clearly.
Step-8

-Replace the default material by clicking ‘Replaces this asset’.
Step-7
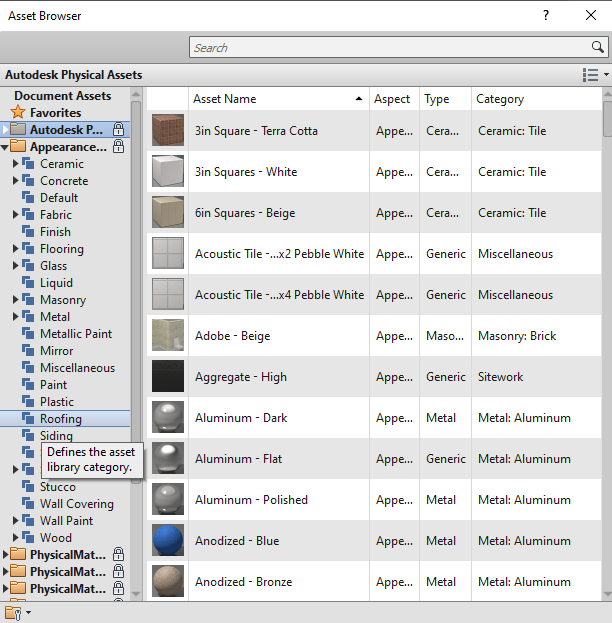
-Select roofing from the Asset Browser and choose the materials according to your requirements.
Step-8

-Replace the current asset in the editor with this asset, which means you are replacing the material with the Default Material which is given by Revit.
Step-9
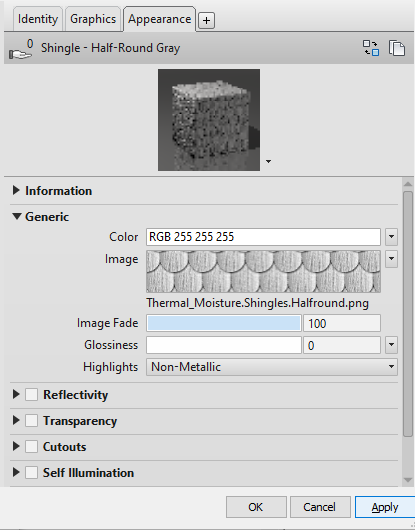
-Click on Apply to apply the material on the Roof and then Press OK and enter.
Step-10
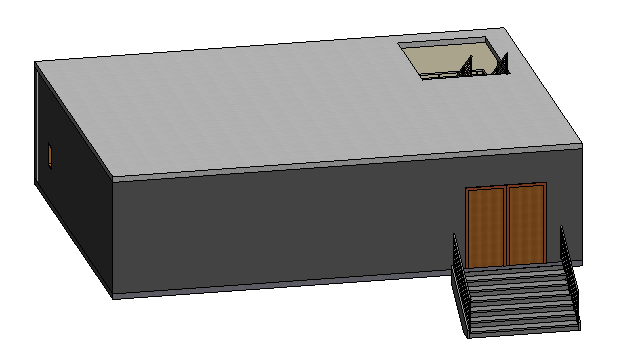
-Final image will appear like this after applying the material to the Roof.